


One of the most well-known e-commerce platforms is Bigcommerce. It is a prominent open SaaS e-commerce platform for both established and emerging brands. The company reported its first-quarter 2021, total revenue of $46.7 million, a 41 per cent increase over the prior year.
While setting up an online store may not be as easy to use as many of its competitors, it’s still straightforward, and what you lose in ease of use, you make up for in customizability.
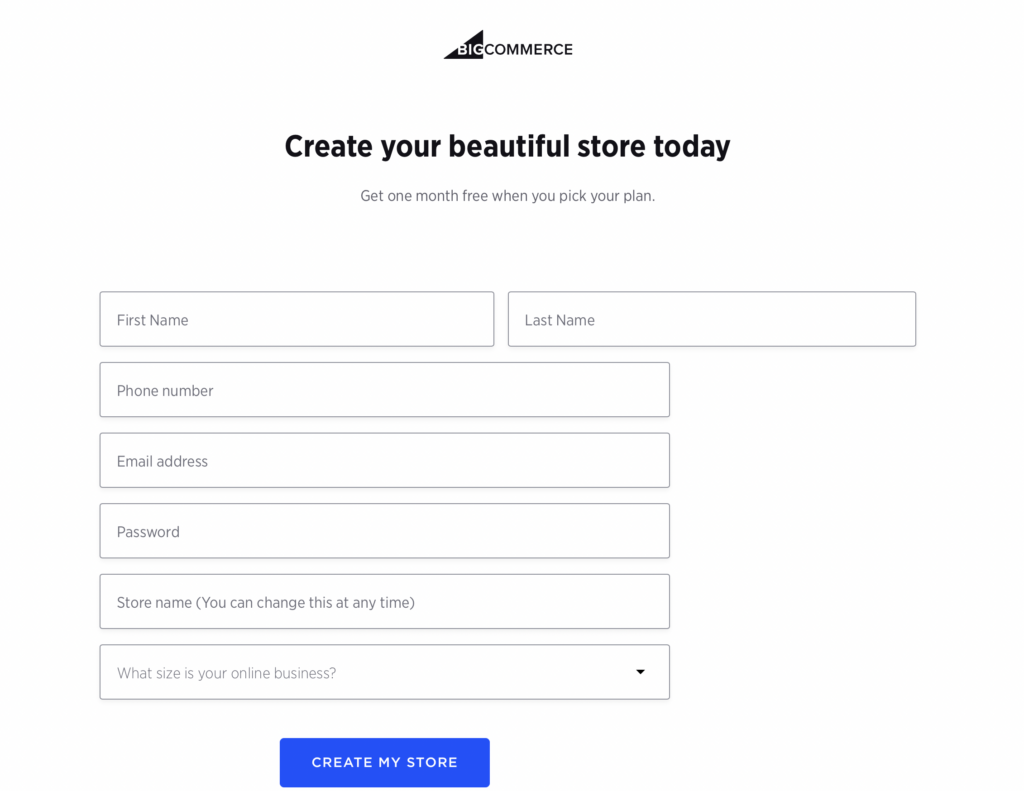
Sign Up
- Sign Up to Bigcommerce website.
- Enter the name of your store into the form on the home page.
Fill out your details
- Enter a few details about you and your store, including what you’ll sell, where you’re based, and your name and contact details.
- Once you’ve filled out your details, click the orange box Create my store now.
- By creating your store, you agree to the Bigcommerce terms of service.

Open Your Store
- Sit tight while Bigcommerce builds your store. This can take up to two minutes.
- When your store is ready, you’ll see a big green open sign, like this:
- You’re ready to go! Click the orange button Visit your store.
Customize Your Store
- When you create your store, you’ll be given the option to use the Bigcommerce Quick Start Wizard to get things set up as you want them.
Launch the Wizard
The Quick Start Wizard looks like this:
- Click the blue button Let’s customize your store.
- If you close the Quick Start Wizard by accident, you can re-open it using the big blue button at the top of the page, Quick Launch Wizard.
- Set You Store Name and Address
- The first stage of the Wizard asks you to complete important details about your store.
- Click the blue button, Update your store settings.
- Here, you can update your store name.
- You’ll also be asked for the address, phone number and admin email address of your store. When you’re done, click the blue Save button in the bottom left.
Set metric and SEO
- Staying on the Store Name and Address page, scroll down to select whether you’ll use metric or US customary units for measuring your products.
- Scroll down further to fill out the SEO settings for your store (Read more about why SEO matters and how to get it right).
- When you’re done, click the blue Save button in the bottom left.
- Click the Bigcommerce logo in the top right to return to your dashboard, where you can relaunch the Quick Launch Wizard.
Choose Your Theme

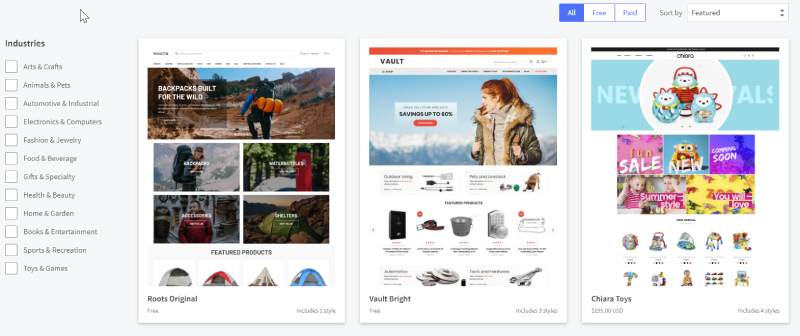
The next stage in the Quick Launch Wizard is to choose your theme and Logo.
- Click the blue button Change your theme and logo.
- You’ll be taken to the area in the Bigcommerce dashboard where you can change your theme, or template.
- The default template is Classic (White). Scroll down to look at the different templates available. To take a close look at any template, click on the template image. You’ll get a zoomed in preview.
- Once you’ve decided on a template you like the look of, click the Apply this template text.
- You’ll be asked to confirm that you understand any customizations you’ve made to your current theme will be deleted.
- As you’re still setting up your store, you can confirm this without backing up your theme. In the future, you should back up your customizations before changing your theme.
- When you’ve checked all the confirmation boxes, click Apply, and the theme will be applied to your store.
Add Your Logo
- At the top of the themes page is a list of tabs.
- The third tab is called Logo.
- Click on this tab.
- You’ll be taken to a page where you can choose to upload your business logo.
- The recommended size is 250 x 100 pixels.
- Bigcommerce will resize your logo if you upload an image of a different size.

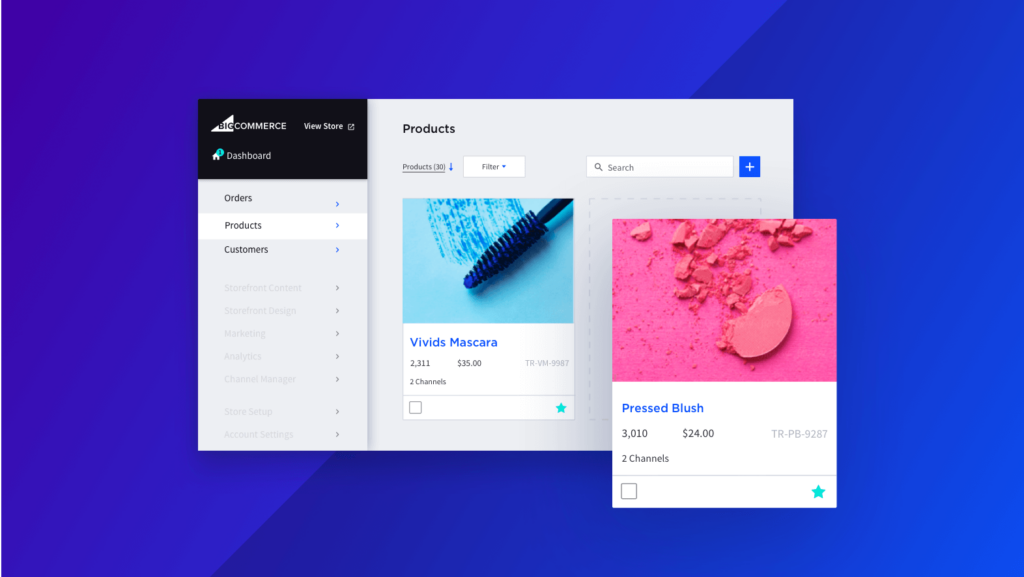
Add Products
- Now you’ve made your store visually stunning, you’re ready to stock up the shelves with products.
Go to the Add a Product Page
- Relaunch the Quick Launch Wizard.
- Click the blue button Add Products.
- You’ll be taken to a page where you can add a product.
Complete Product Details
- Here, you fill out details, including whether your product is physical or digital, the name of your product, and product categories.
- The default categories are Ladies, Mens, Accessories and Sale. You can add your own categories that match the types of products you’re going to sell.
- Additionally, you can choose a product URL and SKU.
- By default, the URL is the name of your product. You can change this to improve your SEO.
- Entering a SKU is optional, but recommended as it can help you to manage your inventory.
Add Product Description
- Scroll down to fill out the product description. This is optional, but highly recommended as it improves the likelihood of your product being found in search.
Name Your Price and Shipping Costs
- Scroll down further to add a price and shipping details for your product. You can choose whether the shipping cost is based on size and weight, or whether it’s a fixed price.
Add a Product Image
- Scroll back up to the top of the page.
- You’ll see you’re currently on the Details tab. Click the Images and Videos tab.
- Here, you can drag and drop an image of your product.
- When you’re done, click Save & Exit (or Save & Add Another, if you’ve got more products to list).
Set Up Payments, Shipping, and Taxes
Set Up Payments
- To sell anything, you need to be able to take payments.
- Head over to the Quick Launch Wizard
- Then click Set up payment methods, which provides easy set-up for PayPal and Stripe.
- Here, you’ll find walkthroughs for setting up PayPal and Stripe.
- To start the walkthrough click the Off button to switch the gateway on. You’ll then be guided through a two-click set-up.
- To choose a different payment gateway, select More payment methods.
Configure Shipping
- Return to the Quick Launch Wizard.
- Click the Ship your products section of the wizard, then select the blue button Choose shipping options.
- Here, you’ll be asked for a business address, and you’ll be given the option to set up shipping zones.
- Zones can be based on countries, states, provinces or ZIP codes. For each zone, you can add a handling fee to your standard shipping costs. Effectively, this allows you to set different shipping rates for different zones.
- Be Tax Ready

Launch Your Store
- With a payment gateway in place, you’re ready to let customers into your store.
- Return to the Quick Launch Wizard, and click the Launch button.
- Click the orange button Launch your store
Keep up to date with our stories on LinkedIn, Twitter, Facebook and Instagram.
